DIY Tool Storage Cabinet for Garage Workshop
If you are a woodworking enthusiast, having a well-organized garage workshop is essential for maximizing your productivity. One of the best ways to achieve a tidy workspace is by building a DIY tool storage cabinet. This project not only helps you organize your tools but also offers a budget-friendly solution to storage woes. In this article, we will guide you through the process of constructing a tool storage cabinet that won’t break the bank, while also providing some cost-saving tips along the way.
Why Build Your Own Tool Storage Cabinet?
Building your own tool storage cabinet allows you to custom-design it according to your specific needs. Buying pre-made cabinets can be expensive and often doesn’t provide the flexibility you need for your tools. By creating your own, you can:
- Save money by using affordable materials.
- Customize dimensions to fit your space.
- Ensure that your cabinet meets your specific organizational needs.
- Gain satisfaction from completing a DIY project.
Materials Needed
For this project, we want to focus on budget-friendly materials that won’t compromise quality. Here’s a list of materials you can use:
- Plywood: Opt for 3/4-inch plywood for the cabinet body. It’s sturdy, affordable, and can be bought in large sheets.
- 1x2 and 1x3 Boards: Use these for the cabinet frame and shelves. They are inexpensive and easy to work with.
- Wood Screws: You will need screws for assembling the cabinet. Choose screws that are suitable for plywood.
- Hinges: Select durable hinges for the cabinet doors. Look for budget options that still provide good support.
- Paint or Stain: Finish your cabinet with paint or stain to match your workshop decor. You can use leftover paint to save costs.
- Handles: Simple drawer handles can be found at a low cost. Consider repurposing old handles if available.
Tools Required
Here’s a list of tools you will need to complete this project:
- Table saw or circular saw
- Drill and drill bits
- Screwdriver
- Measuring tape
- Square
- Sanding block or power sander
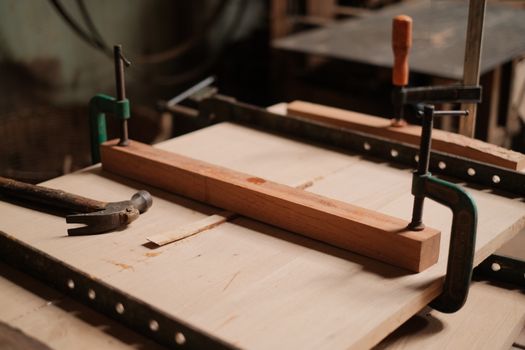
- Clamps
Step-by-Step Instructions
Now that you have your materials and tools ready, let’s get started on building your tool storage cabinet!
Step 1: Planning and Measurements
Start by measuring the space in your garage where you plan to place the cabinet. This will help you determine the dimensions of your cabinet. A standard size for a tool storage cabinet is about 36 inches wide, 72 inches tall, and 24 inches deep. However, adjust these measurements to fit your available space.
Step 2: Cutting the Plywood
Using your table or circular saw, cut the plywood according to your measurements. You will need pieces for the top, bottom, sides, and back of the cabinet. Make sure your cuts are straight and accurate for a clean assembly.
Step 3: Assembling the Cabinet Body
Begin assembling the cabinet by attaching the sides to the top and bottom panels using wood screws. Use clamps to hold the pieces together while you screw them in place. Don’t forget to attach the back panel for added stability.
Step 4: Adding Shelves
Decide on the placement of your shelves. You can create adjustable shelves using shelf pins or fixed shelves based on your tool sizes. Cut the shelves from the 1x2 or 1x3 boards and secure them in place with screws or shelf brackets.
Step 5: Attaching the Doors
Cut two pieces of plywood for the cabinet doors. Attach the hinges to one side of each door and secure them to the cabinet frame. Make sure the doors open and close smoothly.
Step 6: Finishing Touches
Sand the entire cabinet to smooth out any rough edges. Then, paint or stain the cabinet to protect the wood and enhance its appearance. Allow it to dry completely before using.
Cost-Saving Tips
To keep your project within budget, consider the following tips:
- Use Leftover Materials: Always check your garage for leftover wood or materials from previous projects.
- Buy in Bulk: When purchasing plywood or lumber, buy larger sheets or quantities to save on cost.
- Plan Ahead: Take the time to plan your project thoroughly to avoid wasting materials on mistakes.
- Repurpose Items: Look for old furniture or cabinets that can be disassembled for parts.
- Utilize Free Plans: Resources like Ted Woodworking offer free and affordable plans that can help guide your project.
Conclusion
Building a DIY tool storage cabinet for your garage workshop is a rewarding project that can greatly enhance your workspace. By using affordable materials and following our step-by-step guide, you can create a customized solution for your tools without overspending. Now that your tools are organized, you can focus more on your woodworking projects and less on searching for tools!
FAQ
- What is the best type of wood to use for a tool storage cabinet? 3/4-inch plywood is a great choice for durability and affordability.
- How much does it cost to build a DIY tool storage cabinet? Depending on materials, you can build one for around $100 to $200.
- Can I customize the size of the cabinet? Yes, measure your space and adjust the dimensions to fit your specific needs.
🔨 Want 16,000+ Woodworking Plans?
Get instant access to step-by-step plans with blueprints and cut lists.
Get Instant Access →